by ROC Apr 2022
Uncategorized
How to Create a Booking Form in WordPress
Are you looking for a WordPress appointment plugin that will enable you to allow your clients to book appointments online using a booking form? Online appointment scheduling is critical for your business in today’s world.
In this article, we’ll demonstrate how to use a plugin to build a hassle-free appointment booking form in WordPress. It’s time to stop hunting and start constructing the appointment booking form for WordPress that works for you!
Why Use WordPress to Create a Booking Form?
You’ve almost certainly scheduled an appointment at least once in your life. Make an appointment with your physician or get tickets to a concert or film. Additionally, you may schedule a follow-up phone conversation.
You may have made a reservation directly with the business. You’ve probably made the majority of your reservations online.
We’ve become accustomed to arranging appointments online and never speaking to a live person.
Additionally, this is something that your clients and site visitors are accustomed to.
If your business accepts appointments, a booking form is an excellent idea. These are forms that consumers may use to schedule appointments, purchase tickets to an event, or make a reservation on a website.
With a WordPress booking form, you’ll never lose a customer because you weren’t available to take their call.
To that end, here’s how to design a booking form in WordPress.
Method 1. How to Create a Booking Form Using WPForms (Recommended)
Method 2. How to Create a Booking Form Using Formidable Forms
These are the two methods that are commonly used to build booking forms in WordPress.
Method 1. How to Create a Booking Form Using WPForms (Recommended)
Over 5 million WordPress websites utilize WPForms, the greatest form builder available. The plugin’s intuitive drag-and-drop builder makes it easy to add a WordPress booking form to your website.
It’s possible to get started with pre-made templates. This contains templates for event planning, feedback forms, and user registration forms.
Use these pre-made forms to collect money for your nonprofit website or to set up Zoom sessions with possible new clients.
In addition, WPForms is compatible with the most popular email marketing services. This makes it simple to send out alerts and appointment reminders to both your consumers and your team members.
We’ll be utilizing WPForms Pro for this article because it has so many templates and extensions to choose from. WPForms Lite is another option if you’re seeking a free form builder plugin. There are certain paid templates and connectors missing from the free version.
To begin, you’ll need to download, install, and then activate the plugin on your computer. Please check out our article on how to install a WordPress plugin if you need any help.
Go to WPForms » Settings in the WordPress dashboard after activating WPForms. Your license key is now ready to be entered. Your WPForms account has this key.
WPForms > Add New is where you’ll want to head next. The first step is to name your booking form.
It’s easy to get started with WPForms because there are so many different templates available. Selecting the Event Planning category in the sidebar makes sense because we’re developing a booking form.
Templates for everything from purchasing decorations for birthdays to planning a trip may be found right here.

Click on the View Demo button to see a preview of the template. Open a new tab with the template in it.
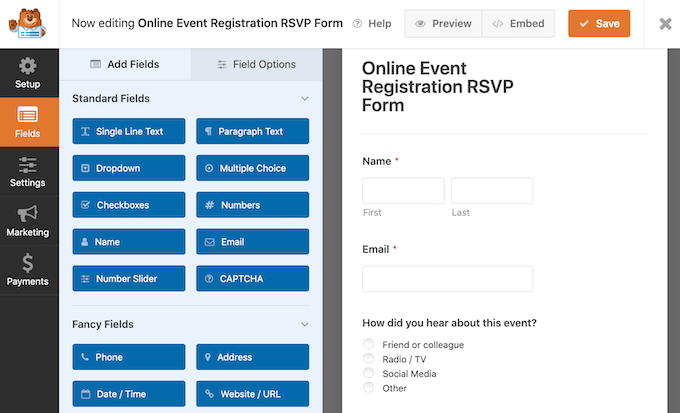
The ‘Use Template’ button will become orange when you’ve found a design you like. The WPForms drag-and-drop editor will now open.
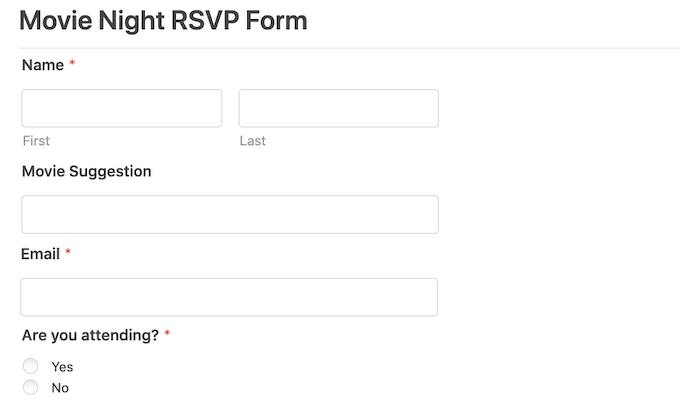
Use the RSVP form for online registration in this lesson. Clients can enter their email addresses and name in the provided areas.
On top of that, it enquires as to how people learned about your event. Finding the marketing channels and sources that provide the highest conversions may be made easier with this information.
Utilize this data to guide future promotions and increase the number of individuals that visit your booking form. See our comprehensive guide on WordPress conversion tracking for more details.
Visitors may also add additional persons to a single booking using the RSVP template for online event registration. Ideal for events that frequently draw large groups, such as tours and concerts.
As a last option, clients may utilize the drop-down boxes to select the day and time of their event.
Customization is available for each of these areas. To make a change to a field, simply click on it. All of the options for the selected field will be displayed in the sidebar.
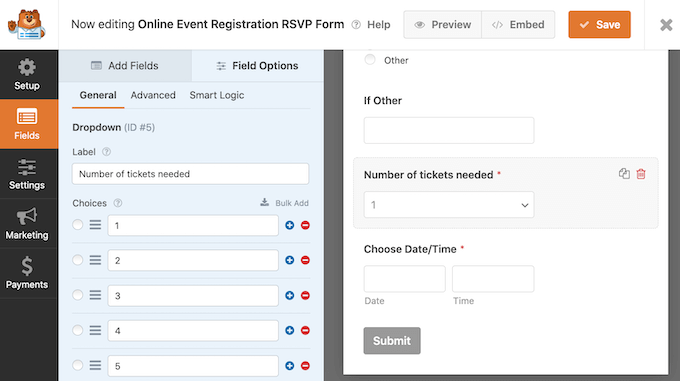
Your booking form in the WordPress template can also include other fields. Then pick the ‘Add Fields’ tab in your left-hand menu if it hasn’t already been selected.
Drag and drop the field you’ve selected into place on your reservation form. Drag and drop allows you to rearrange the order in which these fields show on your form.
Click the Save button after you’re done making changes to your booking form.
Now that you’ve put up your booking form, you’ll need to set up alerts.
By default, WPForms sends an email to your WordPress admin every time someone fills out the booking form. Occasionally, you’ll wish to send these emails to a separate email account. You could even wish to send emails to a number of different recipients.
WPForms makes this simple. In the left-hand menu, click on Settings to change your email alerts. Finally, choose Notifications.
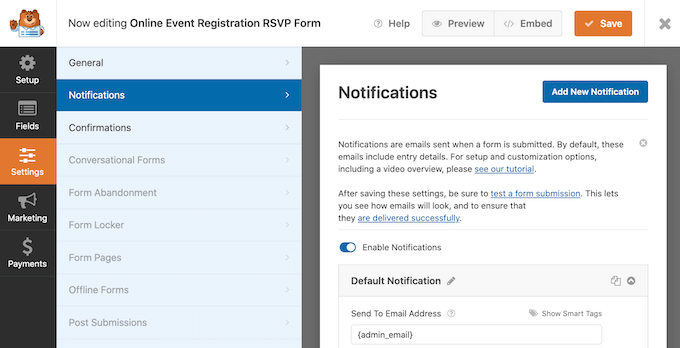
Changing the email and notification settings for WPForms submissions.
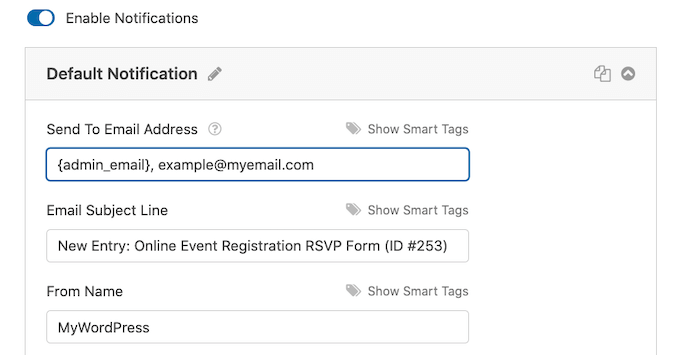
Find the ‘Send To Email Address’ area on this page. This is set to ‘admin email’ by default. Your WordPress admin account’s corresponding email address will be used for this dynamic value.
You may change this dynamic text with any other email address by deleting it and entering a new one. The ‘Send To Email Address’ field may simply be updated to include the new address.
To send an email to more than one person, use a comma to separate their email addresses.
Ensure that all of your emails are sent to the recipient’s inbox and not the spam bin. Utilizing the services of an SMTP service provider is the finest option. For more information on how to solve WordPress not sending emails, please visit our article on how to do so.
It’s time to publish your WordPress booking form now that you’ve done developing it. This form may be added to an existing page or a new one that you design.
As a result, the steps are the same. Simply go to the website where you want your booking form to appear and click the “Open” button. Select the black + icon to continue.
Start entering ‘WPForms’ in the block.
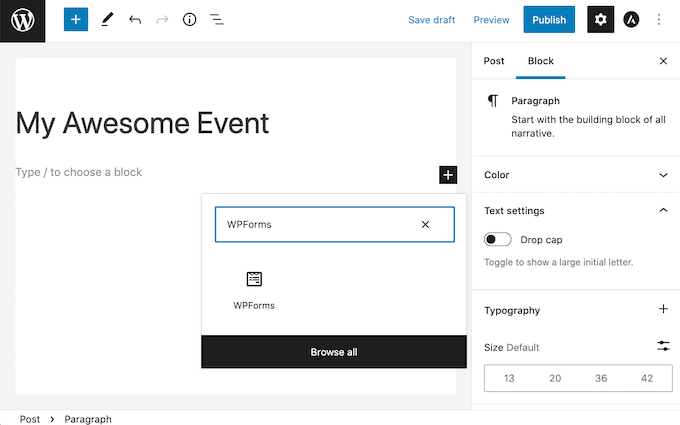
Add this block to your webpage as soon as it appears.
Select the booking form you just built from the drop-down menu in your new WPForms block.
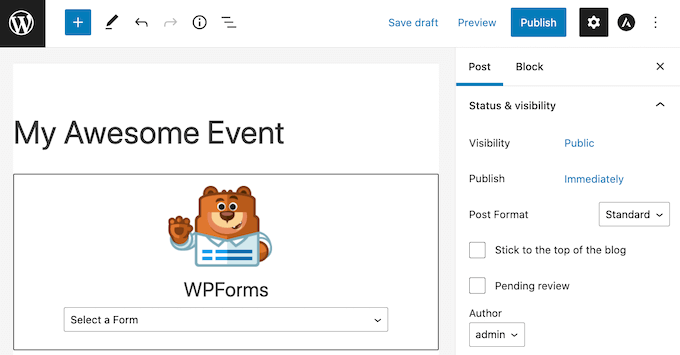
Update and publish your page immediately!
It’s done! You should now be able to use your booking form on your website. If you’re confused about how to get started, you can seek help from WordPress development services in the USA.
Method 2. How to Create a Booking Form Using Formidable Forms
If you are looking for the best WordPress form plugin, go no further than Formidable Forms! With Formidable Form’s drag-and-and-drop interface, you may construct a booking form with more complex capabilities, such as math.
As a result of a large number of available booking form templates, Formidable Forms Pro will be the tool we utilize in this post. Using this, you can construct a simple booking form for your WordPress site.

Formidable Forms Lite, the free version of the plugin, must be installed and activated first. The sophisticated capabilities of Formidable Forms Pro are built on top of the Lite version’s foundation. More information may be found in our WordPress plugin installation guide.
Formidable » General Settings is where you need to go after that. Choose “Click to manually input a license key” and follow the on-screen instructions.
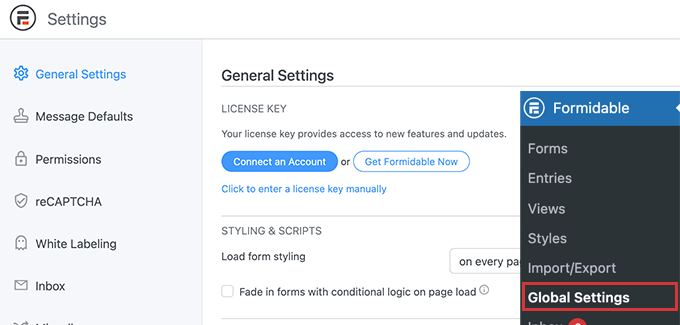
Your license key may be found in your Formidable Forms account’s Downloads area.
Using the ‘Save License’ button, you may paste your license key into this field and save it.
Enter your Formidable Forms license code here.
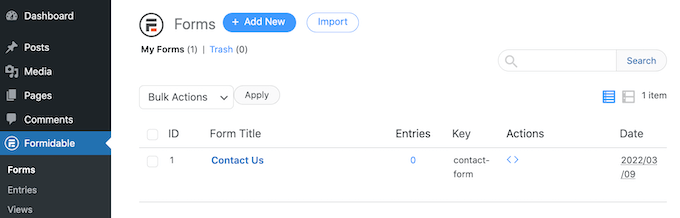
Formidable Forms may be accessed directly from the WordPress menu when your license key has been activated.
Then select ‘Add New’ from the drop-down menu.
Select the template that you like. The Event Planning category could be a good place to start as we’re creating a booking form.
Using the search bar, type “Event Planning” to see all of the templates in this category. Make a selection from the Event Planning category if it exists.
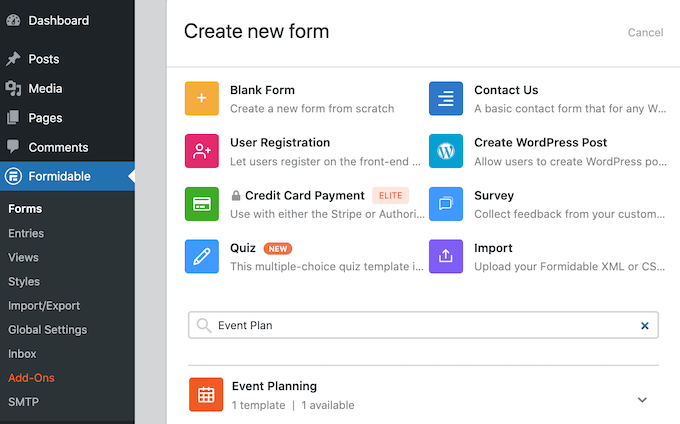
Select the template that you like. All of our screenshots use the Travel Booking template.
Once you’ve selected a template, name it and provide a description. After that, simply click on the Create button. This opens the Formidable Forms editor with your template already open.
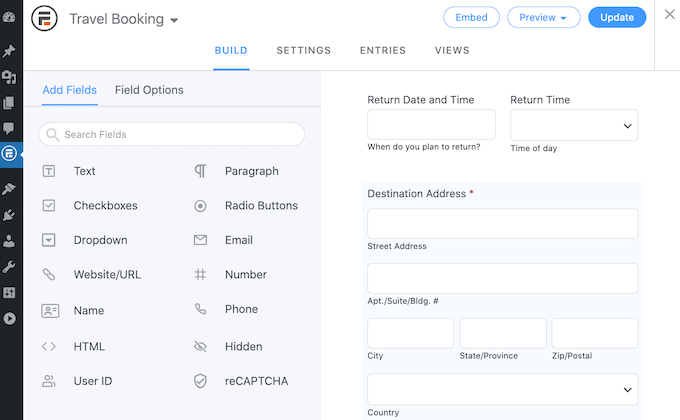
Give it a click to make changes to a field. After selecting a field, the Formidable Forms sidebar will provide all of the available options for that field.
Other fields can be added to your form from this sidebar. These fields can be used to ask for additional information from your visitors or to present them with options. As an example, you may ask whether they want a room with a view of the ocean, or inquire about their culinary preferences.
By dragging and dropping, you may also rearrange the order in which the fields show on your form.
Click on Update when you’re satisfied with your design and want to save your work.
You’ll want to know whether someone has completed your booking form! Formidable Forms, like WPForms, automatically send an email to your WordPress admin.
If you want, you may tell Formidable Forms to send these emails to a different email address, such as your own. These emails can be sent to several email addresses.
If you want to change these emails, go to the Settings tab. Select ‘Actions & Notifications’ from the left-hand menu.
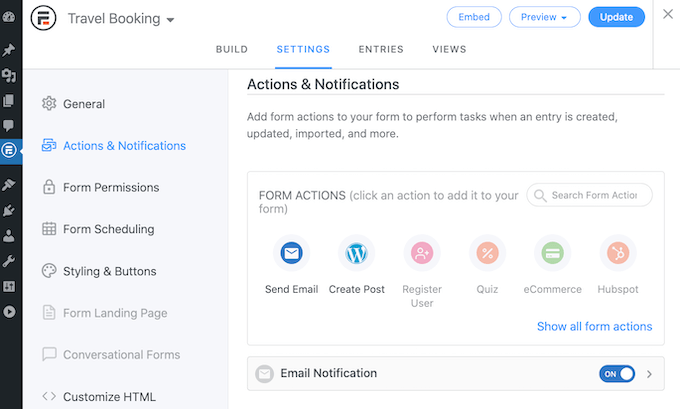
Press the Send Email button. All the settings you need to configure your email notifications are included in this new area. Changing the recipient of these emails, or including other recipients, falls under this category.
It’s now time to integrate this booking form into your WordPress site!
The Embed button is located at the top of the screen. You’ll be presented with a popup window where you can decide whether or not to build a new page just for this form.
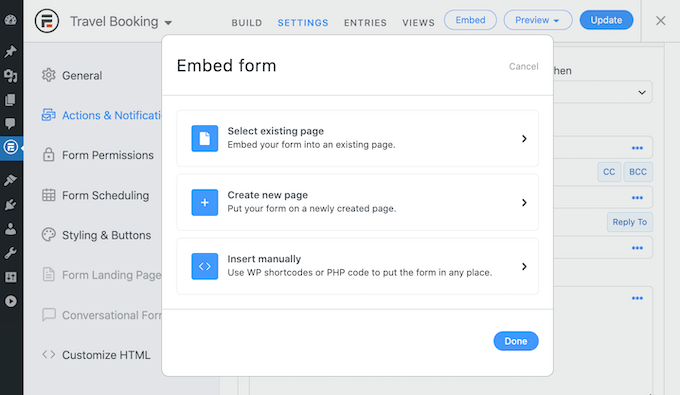
Add a booking form to your WordPress website using these instructions!
This form may also be integrated into a widget. Using this method, your WordPress booking form will appear in the sidebar or header of your theme.
Insert Manually if you want to add your form to a widget. A shortcode will then appear in Formidable Forms. This code may now be pasted into any Shortcode block.
Are you ready to get started? Using a WordPress appointment plugin, you can quickly and easily add a booking form to your website.